BMO e-Leave is capable of creating multiple leave approval groups to accommodate your company leave approval structure. You may choose to have many leave approvers to approve your employees leave application or just one of your managers.
Below is a simple guide on showing you how to change the Leave Approval Group.
- Go to BMO home page and click “Login”.
- Login to your administrator BMO account.
- In your BMO administrator account page, go to HR > Approval Setting > Approval Set to setup E-Leave approval.
- In the Approval Type section, edit approval group for all the leave approvers.
As you can see you can add 2 different approvers from 2 different group. If you would like to add more approvers, please click HERE to refer to the add leave approver guide.
- Click “Save” to save the changes.
- A message box will pop up and show that you have successfully updated the leave approval type. Click “OK” to dismiss the message.
- Now, you can view all the leave approval group and authorized superiors from the Approval Policy table.
You will notice the authorised Superior is “Leo AND Jolie”.
This means the Leave Approvers in the same approval level but different approval groups means it needs both of the approvers to approve the employee’s leave application.
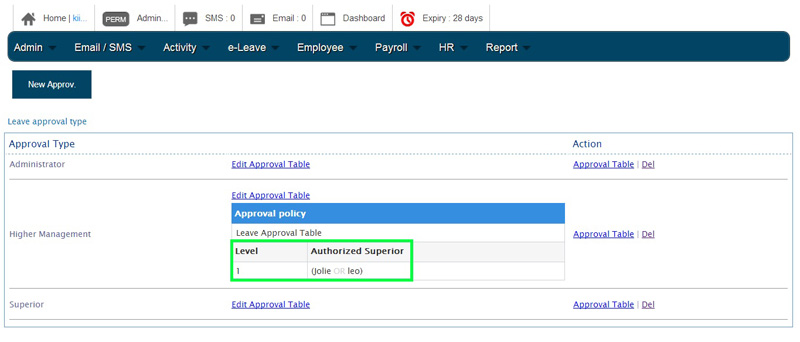
- Finally, if you have approvers in same approval level and approval group, it needs only any one of the approvers to approve the employee’s leave application.
As you can see from the Leave Approval Table, the authorised Superior becomes “Leo OR Jolie”.


